Woman vs House: Tearing another room to pieces
I decided that it was time to take on the front room, as it was a room I could actually finish all the way through, rather than doing bits and pieces and never quite finishing anything 100%.
The front room is a gorgeous large room, with a bay window and a large chimneybreast, with the original dado rails (like picture rails but waist height) still in place. Unfortunately it had been smothered in vile green paint and carpet and the fireplace had been blocked up with yet more faux marble and plywood.
So I started with clearing the room. I pulled up the carpet and underlay, cut them into strips and put them in the back of the van to take the tip. I then cleared out the fireplace. Once again the surround was only attached with two woodscrews, so once they were removed I could lift the surround out of the way. The sheets of faux marble (one against the wall and one on the floor) could also be lifted out of the way easily they weren’t fixed to anything.
This time I was planning a few rubbishy jobs at once so I ordered a mini-skip for the week and didn't have to worry about trips to the tip to dispose of all the rubbish - good move, definitely saved me a lot of hassle and let me concentrate on doing the fun stuff!
So I turned my attention to the floor. The carpet fitters had stapled the underlay to the floorboards, and seeing as I was planning on sanding the floors down, I started by getting my pliers out and pulling the staples out one by one. This is some of the standard things you need to do before sanding your floor. The boards were in good shape and there were none that needed replacing. I also pulled down the existing curtain rail, which was a piece of copper tubing that had been bent round the bay window and threw out the appalling net curtains.
I sanded down the skirting boards using an orbital sander and then washed the woodwork with sugar soap. Sugar soap is a renovators best friend! I then primed the skirting boards with an undercoat, before painting them with white eggshell paint. I prefer the finish of eggshell to gloss for woodwork, so it’s always what I use in my house - but here's some tips on choosing paints too.
The walls were in fairly good condition, so there was no filling required, and a couple of thick coats of brilliant white paint covered up the green walls. I also took down the internal door, which was stained orange, so I could prep it and paint it more easily. I didn’t realise until later that this was a bit of a mistake - I figured that hanging an internal door must be much easier than hanging the front door. I was wrong!
Once I’d sanded the door, treated it with knotting solution and primed and painted it I was ready to re-hang it. Despite the hinges already being cut in the right place, it took me and a friend over an hour to get the door back in the right place and swinging properly. I decided at that point that all the other internal doors would be painted where they were. It may be easier to treat and paint them when they’re not hung, but I doubted very much that any of my friends would want to help me hang doors again.
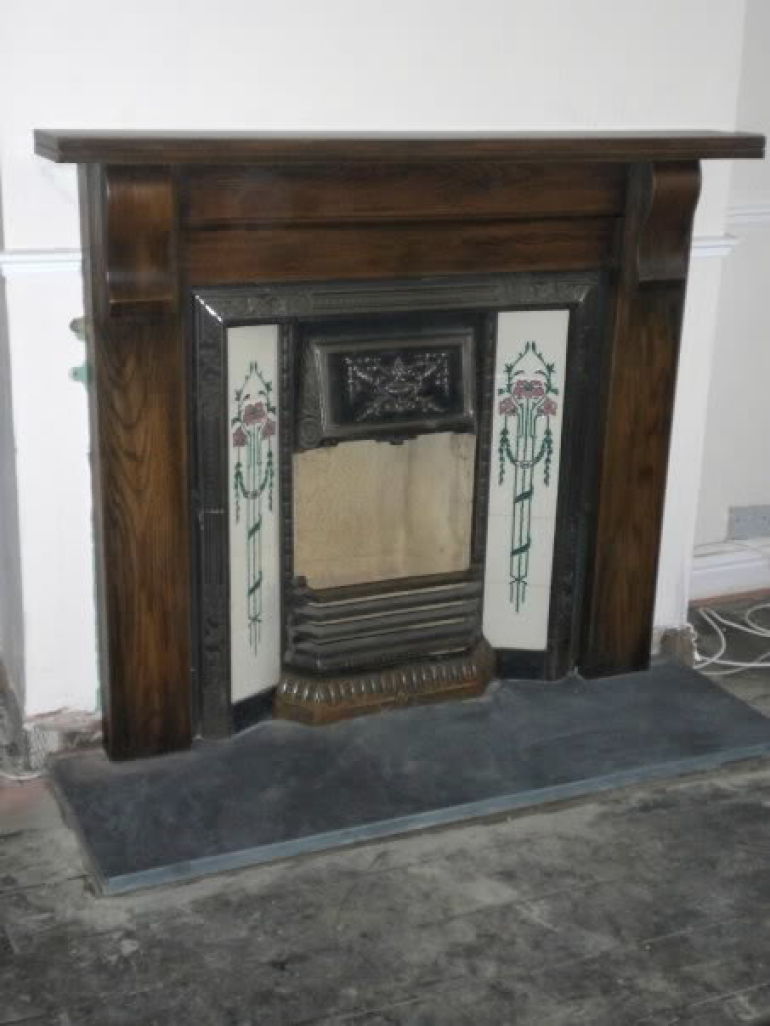
I’d bought another reclaimed fireplace for the front room. This one’s much larger, with beautiful original tiles set into it and I bought a large slab of Brazilian slate to set down as a hearth. As with most things in this house, the floor isn’t entirely level and I wasn’t entirely confident in my ability to set the slate into the floor so I decided to get a builder into fit the fireplace for me. As I couldn’t actually lift this fireplace on my own, I suspect that this was a wise decision.
The fireplace cost me $750, the slate cost me another $100 and the builder charged me $300 to fit the fireplace. I’m really pleased with the job that he’s done on the fireplace, another quality tradesman unsurpisingly. I need to cut down sections of skirting board to finish off around the fire and then I can start with the floors.
Lessons learnt this time around
- Don't take down doors unless you have to.
- Paint the skirting boards and walls before you do your floors - much less protection to do!
- Mini-skips let you work faster and more efficiently, I'll definitely hire one again!


