Kirsten prepares and sands the floor
Floor Sanding Quotes
from local floor sanders

My plan had always been to sand down the original wooden floorboards on the ground floor of the house. I love natural wood floors and I’m very lucky that the boards in my house are in incredibly good condition. I guess ugly laminate does have its uses after all.
Originally my plan had been to sand all of the floors in one go, but I realised that if I did this the hallway and living room floors would get wrecked when I started work on the kitchen with rubble being trampled through them. I decided that I would do the front room floor so that I would have one finished room, and so I would have a good idea about how the other floors would come up when they were done.
First off I read about floor sanding on the internet, and checked out Service Central's tips for floor sanding here. I thenrented a sander from a local tool hire shop, because although it seemed like a massive job I was up for it. They sold me the sander belts on a use or return basis, which was handy as I had no idea how many I would need and they aren't cheap. The sander hire and the belts cost me about $400 and I had the sander for a weekend.
Preparation
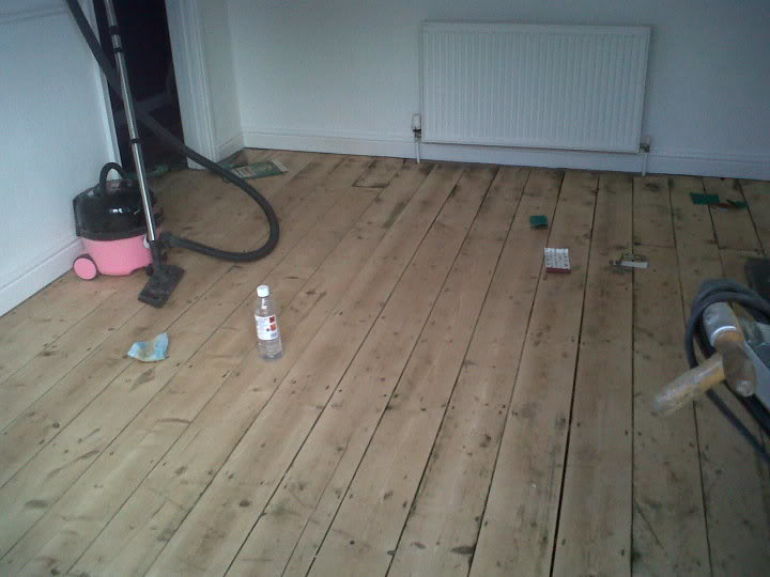
My first step was to check over the floors and remove any remaining staples from the carpet underlay that I'd missed last time round. I then worked my way over the floor checking the ends of each board in turn. Using a hammer and a nail spike I made sure that none of the nails holding the boards in place stood proud of the wood and could therefore rip the sander belts. Some of the boards were a little loose and so I nailed these into place with some large 4 inch floorboard nails. It took me about three hours to prep the floor properly.
I then opened the windows and taped a plastic dustsheet over the closed door to ensure as much of the dust stayed in the room as was humanly possible. I also made sure I was wearing ear defenders and a dust mask.
Sanding and cleaning
I sanded the floors using a grid pattern; so firstly in the direction of the floorboards and then across them. I had to go over the entire floor in this manner four times (so eight times in total) before I was satisfied with the finish on them. It was really hard work as the sanders are fairly heavy. It took me four hours to do this. Five if you count the two half hour breaks I took to lie on the floor and wonder if I’d taken on too much. I then took the edging sander and ran this round the corners of the room to ensure that I hadn’t missed any bits.
The next day I vacuumed the room and dusted down all the walls, as despite the sander having a bag to catch the sawdust there was a huge amount of it everywhere. I needed to repeat the vacuuming and dusting at least four times before the room was starting to look clean again. Here’s the floor after it was sanded, but before I started to varnish it.

As you can see in the picture there’s a bottle of white spirit in the middle. I used this to wipe down the floor to make sure it was properly clean and there was no more dust stuck to it. Wiping the floors with white spirits is actually really useful as not only does it clean them it also gives you an indication of the colour the floor will be once it has been varnished.
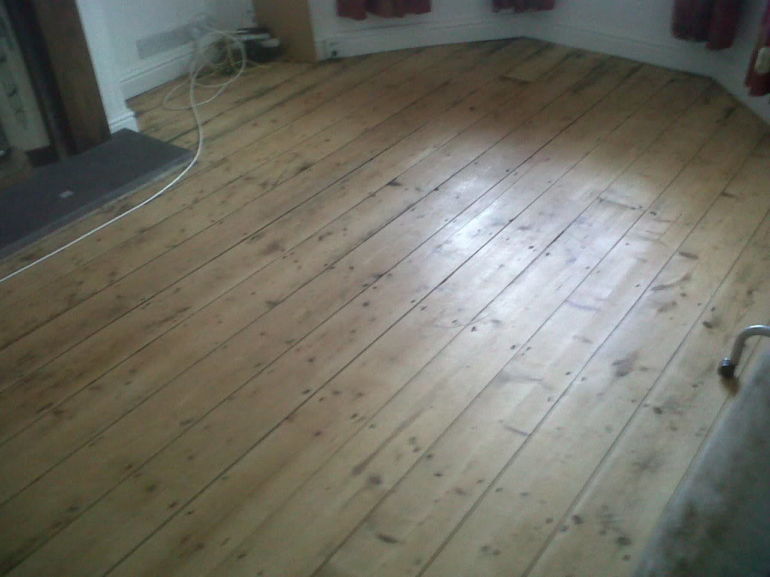
Once I was satisfied that the floor was properly clean, it was time to start varnishing. I didn’t want to use a coloured varnish, given all the time and energy I had expended removing the orange wood from the house, so I picked a clear, satin varnish which is specifically made for floors. Freshly sanded floors tend to drink varnish, so I put on three thick coats. I opted to apply the varnish with a small roller to make sure the surface was as even as possible, but there are people who advocate applying it with a brush or even a mop! I always started in the far corner and varnished my way out of the door. The varnish I’d picked was a fast drying one so I had all three coats on in one day.
My only mistake was to leave my mobile phone on the mantelpiece when I started the first coat. I had to sit and listen to it ring and beep at me for two hours before I could rescue it. Anyway, the final picture of the floor is below and I think it was worth a two-hour separation from my mobile. Looking back, it would probably have been worth getting the professionals to do it - not because they would have done a better job, but because I spent two full days doing it, spent cash on renting the sander and materials which were expensive, and the closest quote wasn't much more than that. Of course, I didn't lose any money for my time but, if I'd had to take time of work to do this then it would have been a completely zero sum game at the end of the day.
Floor Sanding Quotes
from local floor sanders
![]()